BLOGGER TEMPLATES AND TWITTER BACKGROUNDS

Sunday, October 4, 2009

How the Best Goalkeepers Prepare


Hope Solo
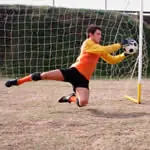
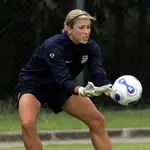
Hope Solo, one of the world's best goalkeepers (AP Photo)

Goalkeepers need to be in great shape and prepared to defend every inch of the net behind them during the course of a long game. That means practices have to be productive to prepare you for game day.

This is a great workout that can really help you improve:

Warmup Jog (10 Minutes)

You should start with an easy jog, to warm your body up before you make any sudden movements that might cause you to pull a muscle.

The first five minutes should be a straight-ahead jog. The next five minutes should include a more active jog in which you should begin shuffling, skipping, touching toes, etc. (all of this should be done without stopping).

Stretching (5 Minutes)

Stretching is something that everyone must do to prepare your muscles for a tough workout. Make sure to stretch all of the major muscle group in a slow controlled stretch.

Handling (10 Minutes)

Note: Another player or coach is needed as a server from here on out during the workout.

Make sure that there is no diving during this part of the handling--you are just trying to work on smoothly receiving shots into your hands.

Start with straight-ahead volleys into your hands (take about 20-30). Then, start to move from post to post as balls are being served to your hands as you reach each post. Next, have the server play balls along the ground as you continue to shuffle from post to post.

Take a minute to rest so you are fresh and ready for you next set.

Next, have the server play balls out of his/her hands up towards the upper corners of the net so you have to jump for the service (make sure service is not too far as we do not want to overextend ourselves at this point in the training). Then, take another rest and stretch some more.

Diving/Rhythm Work (30 Minutes)

While seated, have the server toss or kick balls to both your right and left using proper catching technique. Obviously, catch the ball and return back to the server. Then, switch from side to side and take about 20-30 repetitions.

Next, from a standing position, have the server play balls off the ground at mid-range height to your right side only (take 6-10 reps). Then, perform above drill to your left side. After that, perform the above drill while alternating from side to side.

Finally, perform the previous three drills over but have all balls served on the ground.

Now, place six cones on the ground in a line and about two feet apart from each other. At the end of the cones, put two cones about six yards apart from each other to simulate two goalposts. The goalposts will be located at the end of the cones.

Then, shuffle through the cones. As you get to the end, step into the goal and have the server place balls at mid-range height to your right side. Catch each serve and return it to the server. Then, go back to first cone and start over (take 6-10 reps).

Think it's over yet? You haven't even started. Perform above drill to your left side, then do it while alternating from side to side. After that, perform previous three drills over again, but have all balls served on the ground.

Power Diving (10 Minutes)

This kind of training will really help your body to fly for those tough shots in the corners of the goal.

Place a cone one yard inside each goalpost on the goal line. You should start in the middle of the goal and the server should start somewhere between the penalty spot and the 18-yard line, depending on the accuracy of the server. When the server says to start, the goalkeeper should shuffle as quickly as possible to the cone on the left, and as the goalkeeper touches the cone, the server should toss the ball to the opposite post.

The server should make it a shot that is difficult for the goalkeeper to get to, but not so difficult that a full-out lunge wont do the trick. Do two in a row, come back to the center of the goal, take about five seconds and start in the other direction (take 6-10 reps).

For the next drill, the server should have six to eight balls lined up on the penalty spot. When the server says go, the first ball should be served to the right of the goalkeeper, making the goalkeeper dive to make the save either by catching the shot or parrying the shot and immediately serve the next ball the opposite side of the goal and repeat with all six to eight balls.

Crossing (10 Minutes)

A good training session wouldn't be complete without receiving a number of crossed balls from different angles, heights and speeds.

Start with your server playing a ball into the box from each side of the penalty area. Try and catch each ball at its highest point possible. If there are others around during your training, ask them to come and stand in and around the six-yard box, as this will give you some distraction while handling crosses and make it more like a game situation.

Fitness (Doggies)

Unfortunately, goalkeepers have to be as fit as any other player on the field. Fitness is also important for preventing injury. So, we have to run.

Start on the goal line and sprint to the six-yard box; back to the goal line; then to the penalty spot; back to the goal line; then to the top of the 18-yard box and back to the goal line. This is one repetition.

It sounds harsh, but repeat this four times. Take a one-minute rest and then perform the same doggy three more times. And dont forget: take part in team fitness training.

Cool Down (5-Minute Stretch)

Stretching after training is just as important as stretching before training.

Make sure to stretch all major muscle groups and take a light jog to cool down. Dont be afraid to do 50 push-ups and 150 sit-ups either--strength training is important for preventing injury.

Goalkeeping is all about consistency, and if you train every day, you need to have a work out that you are comfortable with.

Warm Up Your Goalkeepers the Right Way


Goalkeeper

Many coaches believe in visualization and pre-game speeches to inspire their players. While any preparation is good, the opening minutes of the game is the key to goalkeeping success. I also feel it important to do as much as possible to get the backup ready as well--you never know what is going to happen.

Here is how I warm up the goalkeepers for the USA Women's National Team. The first five stints involve both keepers:

  • Ten volleys into hands
  • Goalkeeper rolls ball and I hit it back to their hands (10 each)
  • Goalkeeper shuffles from post to post; when they reach the post I serve ball to their hands (6 each)
  • Balls served into air (from coaches hand) simulating cross ball. (3 to the right, three to the left)
  • Balls served on ground, goalkeeper must dive. (4 to the left, 4 to the right)

The rest of the warm up involves only the starter:

  • Shots from the 18-yard box. Coach and back-up alternate shooting from different angles, forcing the goalkeeper to use footwork across goal before saving the shot. (6 to 10 from each side)
  • Cross balls from each side. (10 from each side)
  • Back to shots from the 18-yard line, now shots are an attempt to score, forcing the goalkeeper to make more difficult saves.
  • Play one touch with the feet (back-up is now at midfield), on every third pass the goalkeeper kicks a long ball to midfield.
  • Goalkeeper works on half volleys and punts.
  • Goalkeeper and back-up take shots from the team.

It is important that the coach pulls the starter from the shooting exercise after a big time save, sending the goalkeeper into the game with the utmost confidence.

If you notice, this warm up includes many exercises. It is designed to involve the goalkeeper in as many technical situations they will face in the game as possible.

The total time of the warm up should be no more than 30 minutes, so the exercises are short but effective.

I have used this warm up at every level that I have coached at and it has proved to be effective at getting players physically and mentally ready to play.

The Laws

It is very difficult to play a game if you don't know and understand the rules. A good goalkeeper -- or field player, or coach, for that matter -- needs to know the Laws of the Game of soccer in order to perform at their best. This section is not intended to be a complete primer on the Laws, but addresses specific areas that relate to goalkeeping. The black and white text of the Law book is supplemented by years of experience and tradition that impact how the game is called and how the players play.

Law 1 - The Field of Play

Although the soccer field and its markings are often taken for granted by the players unless there is something obviously wrong, it can be helpful for the goalkeeper to know the dimensions of the lines on the field. A keeper will use these lines more than anyone else on the field to determine their positioning. Before the game, scan the lines and make sure they are all square and at proper distances. In particular,  the penalty spot is often not marked or mis-marked. If it is off, don't use it as a guide to get centered in goal.

Law 4 - The Players' Equipment

Law 4 says "each goalkeeper wears colors which distinguish him from the other players, the referee and the assistant referees." This is the only requirement. Tradition allows the keeper to use equipment that is not specified for field players: gloves, long pants, or hats. The referee always has final say on what is allowable; if he deems something to be unsafe, it may not be worn.

Law 8 - The Start and Restart of Play

Law 8 has a section called "Special Circumstances" that players, especially goalkeepers, should be aware of. It has to do with the placement of the ball on free kicks inside the goal area. Essentially, any free kick for the defense inside their own goal area is like a goal kick - it may be taken from anywhere in the goal area and must leave the penalty area before it is in play.

For indirect free kicks for attackers in their opponents' goal area, the kick is taken from the goal area line parallel to the goal line at the point nearest to where the foul occured. Thus, no free kick can be taken from closer than six yards to the goal. More on this special circumstance below the section on free kicks.

Law 9 - The Ball In and Out of Play

Although he is (usually!) a bit more mobile than the goalposts, the referee is considered to be part of the soccer field when it comes to play. A ball rebounding off the referee (or off an assistant referee, if for some reason they are on the field of play) is still in play.

Law 10 - The Method of Scoring

Simple as it seems, I have come across players who did not know that the entire ball must be past the goal line for the goal to count. The outside of the chalked line is the true boundary; the whole of the ball must pass over this boundary. The back of the goalposts should be set even with the outside of the goal line, so that the goal frames are actually considered on the field of play, and the ball must completely clear the posts and crossbar to be a goal.

Law 12 - Fouls and Misconduct

Calls involving fouls and misconduct are the most argued about and disputed in any game of soccer. All players need to remember that all fouls and misconduct are strictly in the opinion of the referee. If the referee has made a decision, it seldom does any good to argue about it. Better to let it go and concentrate on the task at hand (setting the defensive wall, preparing for the penalty kick, etc.).

Direct Free Kicks

The goalkeeper is subject to the same Laws regarding kicking, tripping, holding, pushing, tackling, etc. as all other players on the field. Although the Laws don't give the keeper any special privileges, most referees realize that keepers often put themselves at considerable peril in the thick of play and give them some leeway. However, don't use that as license to commit mayhem in the penalty area.

An example of this is the goalkeeper using the knee when going for high balls. As stated in the section on catching high balls the knee is used to generate height and provide some protection, not as a weapon. A referee who feels the keeper's knee is being used dangerously can call the keeper for jumping or charging... and the result would be a penalty kick, if not a yellow or red card in addition.

Indirect Free Kicks

There are four offenses in Law 12 specifically aimed at the goalkeeper. An indirect free kick is awarded to the opposing team if the keeper, in the penalty area, commits one of the following:
  • Takes more than six seconds, after controlling the ball with the hands, to release the ball into play.

    Six seconds is not hard and fast; referees are instructed not to count or signal publicly, and first offenses are usually given verbal warnings. But six seconds is plenty of time to settle the ball, jog up to the edge of the penalty area and find an outlet. During this six seconds, the goalkeeper can move anywhere in their penalty area. Don't get caught by this Law - instead, use it as a reason to work on quick distribution to start the counterattack.

  • Touches the ball again with the hands after releasing it into play, before the ball has been touched by another player.

    Bouncing or softly tossing and catching the ball are not considered "releasing the ball into play", but why even risk it? Bouncing the soccer ball is a holdover from olden days where a goalkeeper was able to move in the penalty area if they bounced the ball (similar to a basketball dribble). That rule no longer applies, so once the keeper has the ball safely in their hands, they should hang on to it until they are ready to deliver it downfield.

  • Touches the ball with the hands "after it has been deliberately kicked to him by a team-mate".

    The italicized above is a direct quote from the FIFA Laws, and is often misunderstood. Remember the intent of the Law, which is to prevent time wasting by the defense. As such, only a deliberate kick by a teammate, either to the goalkeeper or to a place where the goalkeeper can safely pick the ball up, should be penalized. An accidental deflection off a defender's foot, or a missed clearance that falls to the goalkeeper should not be penalized.

    But as always, "deliberate" is in the opinion of the referee. So if in doubt, don't pick the ball up - unless the ball is at risk of going into the net if you don't use your hands! In that case, better to concede an indirect free kick than a goal.

  • Touches the ball with the hands directly from a throw-in from a teammate.

    The goalkeeper may still be used as a target for a throw-in, but they must handle the ball with their feet like any other player.

An indirect free kick can also be given to the goalkeeper's team if an opponent prevents the ball from being released into play by the keeper. This is seldom called, but it's good to know the keeper gets a little protection in the Laws!

Finally, it is an indirect kick if an opponent plays in a dangerous manner. This applies not only to endangering an opponent (e.g. high boot) but also to endangering one's self (this is why the player on the ground is called for this - they have put themselves in harm's way). By tradition, the goalkeeper is given leeway here and is allowed to put themselves in positions that would be dangerous for any other player on the field (for example, sliding at the feet of an attacker).

Law 13 - Free Kicks

Direct and indirect kicks differ in one respect: a direct kick that goes into the net without being touched is counted as a goal; an indirect kick must be touched by another player (on either team) in order to count. Indirect kicks are signalled by the referee raising one arm straight up above his head. Look for this signal; if it is not given, assume a direct kick. If in doubt, ask the referee -- most will also inform you verbally.

Occasionally an attacker will not realize a kick is indirect and shoot straight at the net. In this case, if it is a difficult save, the keeper should just let the ball go in rather than risk deflecting the ball in themselves and providing the touch that let the goal stand. But be absolutely sure it is indirect and nobody but the shooter touched the ball. If in doubt, try to make the save. (By the way, an indirect kick that goes into the net without being touched is awarded a goal kick.)

Any free kick from within the penalty area must leave the penalty area before it is considered in play.

Everybody knows that the defenders must be 10 yards from the spot of a free kick, but what about an indirect free kick that is less than 10 yards from the goal (subject to those "special circumstances" in law 8)? In this case, defenders are permitted to be closer than 10 yards provided they are on the goal line and between the goal posts. This kind of situation doesn't happen much, but it can come up and it would be wise if the keeper knows how to set the defense if this happens.

Law 14 - Penalty Kicks

The only time during a game a goalkeeper should be standing on the goal line is during a penalty kick, and that is only because the Law says so. Goalkeepers are allowed to move side-to-side along the goal line, but not to move forward until the ball is struck.

Why is this Law disregarded so often? Moving forward offers the goalkeeper a host of advantages, from a better catching position to narrowing the size of the net the shooter sees. Why isn't it called more often? Tradition, mostly. This is one of the most inconsistently called Laws in the book, especially for one that isn't even a matter of opinion. Until FIFA decides referees are going to enforce this one to the letter, or the rule is rewritten, we will have to live with the inconsistency.

Equipment

The special demands of goalkeeping call for special equipment. Exactly what a keeper uses is personal preference, but here are some notes on goalkeeping equipment. (Buy your gear via the links on this page and help support this site!)

Gloves

Goalkeeping gloves are designed to protect the goalkeeper's hands as well as provide a better grip on the soccer ball. They range in price from $10 to over ten times that! The gloves a keeper buys will depend on budget and needs, but here are some things to look for when purchasing gloves.

  • Grip. How well does the glove surface (usually latex foam) stick to the ball? In general more smooth foam grips better than dimpled foam. I don't recommend gloves with rubber "ping-pong paddle" grip or rubberized grids - they just don't grip well enough. I also recommend gloves where the entire palm surface is foam, not just a few spots here and there. More expensive gloves have specialized foams (and better marketing!), but that doesn't necessarily mean they always grip better.
  • Durability. It would be nice if those expensive gloves lasted for a long time. Unfortunately, great grip sometimes comes at the expense of durability. Thicker foam will usually last longer, since the grip goes throughout the foam itself and is not just at the surface. Some soccer gear catalogs  have durability as well as grip ratings for the gloves they sell. Durability applies to more than just the foam, too. Poorly made gloves can start coming apart at the seams before the grip is worn out.
  • Cushioning. Gloves provide cushioning to take the sting off a hard hit ball. Thicker foam and glove material helps this; just make sure it's not so thick it hinders the grip.
  • Wrist Support. Decent gloves will provide some support for the wrist which can help prevent injury on very hard shots. Look for a wide wrist strap that can be tightened securely.
  • Comfort. What glove feels comfortable will vary from keeper to keeper. Some gloves are made with vents or breathable materials to prevent sweaty hands.
  • Fit. While goalkeeper gloves should naturally be a bit large-looking on the hands, the exact fit, tight or loose, is up to personal preference. Some keepers like their gloves snug, others like them a bit larger. Many keepers who like close-fitting gloves prefer a negative-cut glove (finger seams are sewn on the inside), which are designed for a more snug fit. On the other hand (so to speak), resist the temptation to buy gloves that are too large, especially for young, growing keepers. The gloves should not be so big that the hand moves around inside them or the gloves twist or bend around the hand.
  • Other features. Manufacturers have come up with all kinds of ways to get you to spend more on goalkeeping gloves. Finger protection is one of the most popular - the glove's fingers have plastic inserts that allow the fingers to flex forward normally but not bend backwards. The intent is to prevent finger injury, at the expense of some feel and flexibility. While they may help against certain types of injuries and provide a feeling of security, they are not a cure-all for injury problems or a substitue for developing strong hands. Other gloves have special foams for certain conditions, differently sewn seams, etc. The choice of any of these should be dictated by keeper preference and wallet size.

Glove Care

Once you've gone out and spent all that money on a pair of gloves, you want them to last as long as possible. For gloves, an ounce of prevention is worth a pound of cure. Here are some basic tips for prolonging the life of keeper gloves:

  • The biggest thing a keeper can do to make their gloves last longer is to use proper technique! Catch the ball and use it to cushion a fall instead of slapping it away and falling on the hands, and don't use hands to get up if possible. Practice, practice, practice.
  • Keep two sets of gloves, one for practice and one for games only. When my match gloves start to lose it, I relegate them to the practice pile. Only use the $100 gloves for games.
  • Wash the gloves after every use. This has two benefits - it removes dirt and grime from the latex, and it keeps them from smelling! (The latter is a major benefit when gloves are being shared.) Hand wash them in mild dish soap (I have never had a problem with this damaging the foam - however, don't use dishwasher detergent) and rinse them thoroughly with clean water. Let them air dry out of the sun.
  • Store them in a plastic bag in a cool, dry place (not the trunk of the car). Make sure the gloves are dry first so they won't mildew. The plastic bag will keep the foam from losing its resiliency and tackiness.
  • Most latex foam gloves will grip best if slightly dampened before use. The keeper should have a water bottle in goal not only for drinking, but for moistening gloves on dry days. A little water can make old gloves usable for just a little while longer.


A final note on gloves:  even expensive, sticky gloves are no substitute for proper catching technique. A good goalkeeper should be able to perform well without any gloves at all; gloves merely add a measure of safety and comfort.

Goalkeeping Jerseys

Goalkeeping jerseys are traditionally long-sleeved to protect the elbows against the occasional scrape on a dive (you'll note that any elbow padding on a jersey is not significantly thick). A number of goalkeepers, though, favor short sleeves.

The only stipulation in the laws is that the goalkeeper wear "colours which distinguish him from the other players, the referee and the assistant referees". So the  goalkeeper should have at least two jerseys that differ from their team's uniform, and possibly a third to avoid conflict with referees. (The official referee uniform color is yellow as of this writing, so that may be a good color to avoid for goalkeeping jerseys if you're buying new ones.)

Any other goalkeeping jersey feature, like sticky dots on the chest, is mere marketing. You can't catch a soccer ball with your chest!

Goalkeeping Shorts and Pants

Goalkeeping shorts and pants are traditionally padded at the hip to protect the keeper on dives. Full pants are particularly useful if the soccer field has little grass or lots of rocks. Special shorts or pants aren't a necessity although some keepers prefer them.

If the keeper plays wearing shorts, I would  recommend a pair of compression or bicycling-type undershorts (aka "sliders"—which must be the same color as the main short, according to the Laws). These will not hike up on a slide, helping to prevent "strawberry" scrapes on the hip and upper leg.

Additionally, it might be a good idea for a keeper to  have an inexpensive pair of pants or sweats in their bag for protection on days when the training topic will be breakaways and there will be lots of sliding.

Hats

If the sun is low at game time, goalkeepers will often be allowed by a referee to wear a hat to shade their eyes. The hat should be soft-billed with a bill that is not too long. I like to use a bicycling cap - the bill is short, it can be easily flipped up out of the way, and they are usually elastic-lined so they will stay securely on the head.

Make sure you clear any non-standard equipment like a hat with the center referee before the game.

Equipment That Should Not Be Part of a Keeper's Uniform

I often see goalkeepers wearing a couple of items that they probably should not be using.
  • Knee Pads.  I believe goalkeepers should never wear knee pads. You never see the pros wear them, and you will not find a single technique on my pages that requires a keeper to land on their knees (although a few training progressions will have steps where they start from their knees).  If your keeper regularly skins their knees, go analyze their play to find out why they are doing so and fix their technique! Particularly watch dives and ground or rolling ball pick-ups, as these are techniques that often result in bloody knees when done incorrectly.
  • Elbow Pads. Although not as bad as knee pads, elbow pads also should not be used for similar reasons. Landing on the elbows can certainly be dangerous, but rather than putting elbow pads there, the keeper's technique should be fixed so they are not falling on their elbows in the first place. A long-sleeve jersey should be enough to protect against the occasional elbow scrape.

Psycology

The position of goalkeeper is one of the most psychologically demanding on the soccer field. Mistakes are final. The glory is usually reserved for the players at the other end of the field. It's not a position for everybody. You can't be stupid and play goal, but perhaps you must be a little crazy.

A coach must, of necessity, be a part-time psychologist, and nowhere is this more important than for the goalkeeper, where confidence is key. I am not a sports psychologist, nor do I play one on TV, but here are a few ideas I have found a coach can use to help a goalkeeper's mental toughness and attitude.

  • Only play those who want to play in goal
    In youth soccer, everyone is encouraged to try all positions. However, I would not include goalkeeper in that category, at least in game situations. It does no good to put someone in the box who simply does not want to be there. It can be shattering for a youngster to be scored upon. If you must, try everyone in practices, but limit game play to those who want to be (or at least, don't mind being) in net.
  • Stay positive when goals are scored
    It can be tough to be positive, especially when a simple lapse has just let in the game-losing goal with seconds to play. Goalkeepers need to be able to put mistakes behind them quickly and recover, so try to put a positive spin on things:
    • Credit the shooter. Sometimes the opposing team has just made a great play; give them credit - it's not always a mistake by the keeper that lets a goal in.
    • Don't dwell on it. Help the goalkeeper shake it off quickly, make a fast coaching point if necessary, and move on once the kickoff has been taken. You can cover problems in more depth at the next practice.
    • Look for the technique that needs improvement. Focus on the skill that needs work, not the fact that the goal was allowed. Very often it's just basic footwork or catching that needs brushing up.
  • Give credit for other than direct saves
    A keeper can keep the soccer ball out of the net in more ways than making a direct save - forcing a missed shot gets the job done too. Aggressiveness goes a long way here - by making the shooter decide too early, a keeper can force a miss or a pass on an otherwise open shot. A goalkeeper who can get into the heads of opposing forwards early has a huge advantage.
  • Don't panic after a save
    This applies to both coach and goalkeeper. Give the keeper time to internalize the save (builds confidence), calm down, give field players time to recover, and look upfield to restart the attack. Six seconds is plenty of time to do all this. If you stay calm, you're showing that you have confidence in the keeper's ability to control the ball and the game.
  • Help the keeper develop good habits
    Teach them good technique, then hammer it in with repetition. Don't allow any lazy or sloppy technique, even when they're not officially doing drills or playing. Good habits will show themselves in games just like bad habits. Repetition is the key; doing it right every time (consistency) is what separates a good goalkeeper from a great one.
  • Don't allow less than full effort, every time, every shot
    Every shot deserves an attempt at a save, even if it seems futile. Eventually, the shots that seemed impossible to stop before will start coming into range. If the effort is there, the results will start to come.
  • If things aren't going well, pull the goalkeeper with care
    Many coaches will pull a keeper if they are getting shelled, but be aware of the repercussions of this. Some players will take this as a sign you lack confidence in them, and only go downhill. Make sure you stay positive, and point out you're not pulling them because they are a poor player or person, just that it's not their day.
  • Encourage additional training
    There isn't always time to properly train a keeper in normal practice sessions, especially when that player needs to develop foot and field skills as well. Encourage them to attend club or private training sessions, goalkeeper camps, rent or buy books or videos, or visit this and other web sites. A player who is serious about goalkeeping needs all the extra training and practice they can get.

Penalty Kicks

The penalty kick was introduced to soccer in 1891 to combat the growing use of illegal means to prevent goals, particularly by handling the ball. In 1905, the requirement was added that the keeper stay on the goal line until the ball was kicked. This denied the goalkeeper the liberty to advance up to six yards, which resulted in "too many" unsuccessful penalties. In 1929, a prohibition on the keeper's lateral movement was imposed, but was generally ignored. This Restriction was repealed in 1997, in recognition (or resignation?) of the fact that goalkeepers were moving along the line anyway.

As the Laws of the game of soccer currently stand, the goalkeeper must be on the goal line between the goalposts, and may not move forward until the ball is struck. All other players are outside the penalty area, at least ten yards from the ball and behind it. The shooter is identified, the keeper and other players take up their position, the referee signals, and the pressure is on!

For the goalkeeper, a penalty-kick really is a no-lose situation. The keeper is not expected to make the save, so the pressure is on the shooter (the conversion rate of penalty kicks, at all levels of soccer, is 80-90%). But there are tricks a goalkeeper can use to increase their odds of making the save.

The days of guess and dive are over. The goalkeeper should learn to "read" the shooter to try to predict where the ball is going. Combined, perhaps, with scouting reports on shooters, and statistics on general tendencies, a keeper can do much better than 50% in picking direction. Although picking the correct direction doesn't always mean the keeper can make the save, it gives them a head start.

Reading the Shooter

  • Watch the shooter's eyes and overall demeanor. Often they will give away small clues before they are ever ready to shoot, like peeking at the corner they are aiming for.
  • Watch the approach. Is it straight on, or wide? A very wide approach often indicates the shooter is going towards the opposite corner. A straight-on approach gives fewer clues.
  • Watch the plant foot. The ball will go where the plant foot points.
  • Watch the hips. The ball goes where the hips point. A "push pass" shot will require the hips to open up in the direction the ball is going.
  • Watch the head. If the shooter drops their head low with a big pull-back of the leg, it usually means a cross-body shot. If the head stays up more, it can mean the shooter will stay open to push the ball to the opposite corner.
  • Don't react too soon. Use the cues above to predict where the ball might go, and be ready to go that way, but wait a split second to be sure it really is going there. The keeper might think one direction based on the shooter's eyes and approach, but the plant foot and hips may tell a different story just before the ball is struck.

General Tendencies

A study done of all the penalties taken in the 1998 World Cup (including shootouts) noted that almost 70% of the kicks taken went to the opposite side from the kicker's dominant foot (that is, right-footed kickers shot to their left -- keeper's right -- and vice versa). (See Goalkeeper Soccer Training Manual, DiCicco 2000.) This is the natural swing of the foot across the body; it is difficult to put the ball to the other corner with an instep kick. So, if all else fails, the keeper should go right for a right-footed kicker and left for a left footer.

Don't Act, React

Also, the goalkeeper should react quickly, but not too quickly. Many penalties, especially at the youth level, are poorly taken, either weakly hit or right down the middle. Often the goalkeeper can easily make the save if they just wait and simply react to the shot.

Even "reading the shooter" is a reaction to what the shooter does, and not just guesswork.

A veteran goalkeeper will use all of this, plus their gut feel from years of experience, to try to save a penalty. Brad Friedel says, "Generally there are loads of subtle little hints as to where a player will shoot that they give to the goalkeeper. How he runs up to the soccer ball, how he stands, if his weight's back, if his weight's forward, if he's looking at you the whole time, if he takes a long run as opposed to a short run. There are lots of little differences but you will never really get the gist of it unless you practice a lot of them and figure out what works best for you."

Advance Tactics

Here are some key points for several important tactics a soccer goalkeeper must know.

Setting a Wall

Wall Diagram
Fig. 1: Setting a Wall
If the opponent is given a free kick within 10-20 yards of the penalty area (or an indirect kick inside the penalty area), the standard defense is to make a "wall" of two or more players the minimum 10 yards from the spot of the kick. This wall serves to block part of the goal from the shooter so that the goalkeeper only has to worry about guarding a small portion of the goal mouth. However, if the wall is not properly positioned, it my actually do more harm than good!

The wall must be set up quickly, following these basic guidelines:

  • One defender must identify themselves as the outside "anchor" of the wall. Make sure everyone knows who this is; they should raise their hand and make eye contact with the keeper. Some teams may wish to identify this player ahead of time, even in practice sessions.
  • The goalkeeper must choose how many players will be in the wall. The more extreme the angle, the fewer players. Two players is sufficient for a ball close to the end line; the keeper might want as many as five or even six in the wall for a straight on shot. The exact number will depend on the situation and how much goal the keeper feels confident covering.
  • The goalkeeper sets the "anchor" just outside a line between the soccer ball and the near post (Fig. 1). This covers the near part of the goal with a little overlap to prevent balls from bending around the wall. The keeper will usually dash over to the near post to sight from the post to the ball to make sure things are positioned properly. While doing this the keeper is way out of position, so speed is essential! Some teams prefer to free the keeper of this duty by using a forward, who lines up the wall by sighting frombehind the ball back towards the goalpost.
  • The other players line up against the "anchor" player to the inside of the goal. Players need to be right against one another so no ball can slip through the wall.
Once the wall is set, the goalkeeper moves to cover the space between the inside of the wall and the far post.

On rare occasions, the attacking team will win an indirect free kick in the penalty area that is less than 10 yards from the goal. (More on this in the laws page.) What to do then? Defenders are allowed to be closer than ten yards to the ball, provided they are on the goal line and between the goalposts. The wall, then, will actually be set in the goal. The tallest players available should be on the goal line, to prevent a chip shot under the crossbar. Since this can only happen on an indirect kick, one defender should be designated as the "bullet man" to rush the ball as soon as it is touched and disrupt a subsequent shot.

Most teams almost never practice this situation; I have seen it occur only a handful of times in thousands of games I've seen. But a good goalkeeper is prepared for any situation, and if they're aware of this provision of the laws, they can organize things quickly if it should ever occur.

Handling Corners

Corner Diagram
Fig. 2: Corner Kick Setup
Key points for handling corner kicks:
  • Anything within the 6-yard box in the air should belong to the keeper! Older players should be able to extend their range even beyond this. Train your keepers in traffic so they will have the confidence to collect corners and crosses in their goal box.
  • Start position will vary, but I prefer a spot about 2/3 to 3/4 of the way to the far post (Fig. 2). This is because it is easier to move forward quickly than backwards. The area the keeper should easily be able to cover is shaded in gray.
  • Always position a defender on the near post, shoulder right up against it and facing the corner. This player is there to clear away hard driven shots to the near post that the keeper can't get to.
  • For balls hit over the head past the far post, track the ball, leave it late and either punch it wide or be ready for a shot or deflection from the far side (the yellow shaded area in Figure 2). Some goalkeepers or coaches like to station a player at the far post to handle these, similar in duties to the near-post defender. I prefer to have this defender marking rather than standing at the far post.

Handling Back Passes

The goalkeeper must sometimes make themselves available as an outlet for a defender under pressure. However, if done incorrectly, a backpass to the goalkeeper can result in tragedy - an uncontested givaway in front of the net or even an own goal. Here are key points for back passes to the keeper.
  • The goalkeeper must ask for the ball. Don't ever back pass to keeper who isn't expecting it!
  • The keeper who is making themselves available must move away from the goal and outside the near post. This puts them in the least vulnerable position should the pass go awry.
  • The passer must pass with good pace and outside the near post. Many own goals have been scored by defenders who passed inside the post and missed connecting with their keeper.
  • Once the ball is received, the keeper must clear it quickly, preferrably with one or two touches. Switching fields is often a good option to get the ball away from pressure. This is a skill that must be practiced!